Image Processing
Like any modern telescope, Webb does not take colour images like a film camera would. The images that are beamed back to Earth are in black and white, and much more work is done on them after they are received, to create the spectacular vistas we are familiar with. This processing is not just necessary to make them look good, but also to highlight a variety of useful scientific information.
Webb’s black-and-white exposures, or ‘frames’, reflect the number of photons (particles of light) that have fallen on the detector of one of its instruments, such as MIRI or NIRCam. The more light hitting a pixel during the time the detector was “exposed” to light, the brighter that pixel appears in the image. This is the most efficient way of measuring the light collected with high accuracy, which is critical for scientific results. The detectors used in Webb’s instruments are only sensitive to photons of near- or mid-infrared light, as well as a small part of the red end of the visible light spectrum. An ultraviolet photon, for example, wouldn’t appear in the image.
Astronomers want to know exactly what kind of light the image represents, because that can tell them what physical process may have created the light, or shifted its wavelength, or partially blocked or absorbed it. Filters are used to restrict the light reaching the detector to a very specific wavelength range for each exposure. In the case of Webb, these filters cover various different parts of the infrared spectrum, some wider, some narrower. It is these black-and-white, filtered, ‘raw’ exposures that are sent back to Earth, where they are made available to scientists and to the public.

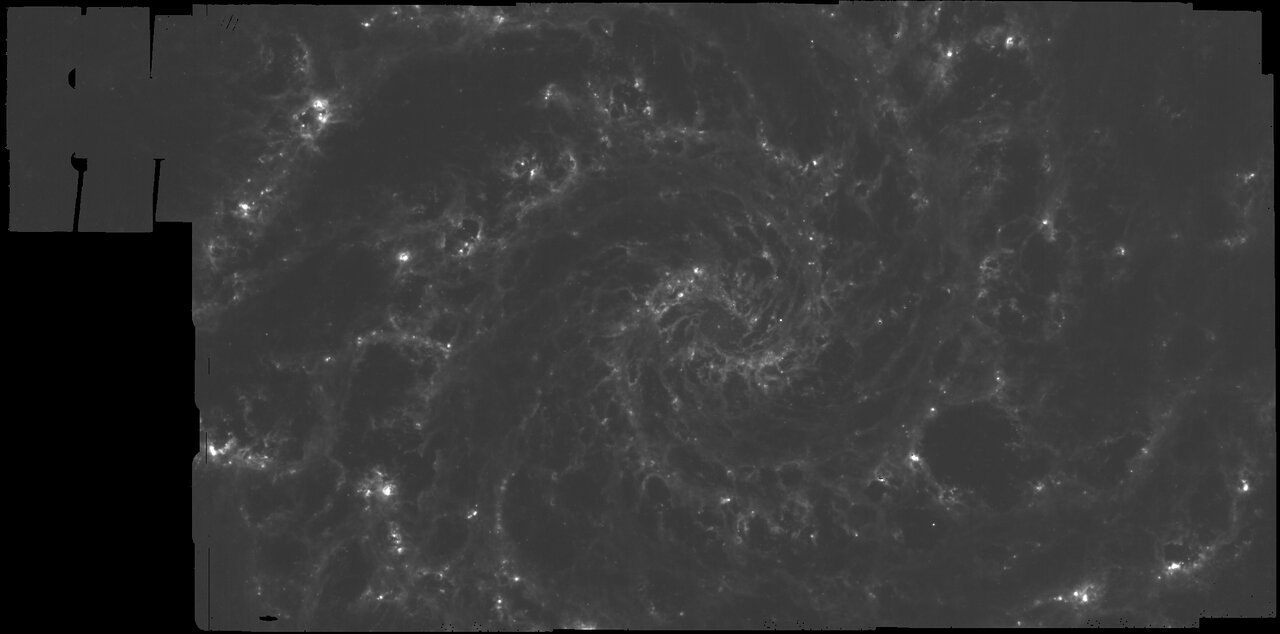
An exposure of the galaxy Messier 74, in the F770W mid-infrared filter. This shows how bright the galaxy is in light with a wavelength of around 77 000 nm. Before being published on MAST, the public archive for images from space telescopes, images like these are processed to remove artifacts caused by the telescope or instrument.
This is just the starting point for creating a full-colour image, which will consist of several raw frames combined. Sometimes a few exposures of the same target in the same filter are ‘stacked’ together, to create a single frame which is brighter or clearer than any of the originals. Often these combined exposures taken around a part of the sky are ‘stitched’ together into a mosaic — especially useful if the subject of the image is larger than the telescope’s field of view. Raw frames also often contain artefacts which aren’t relevant to the target, like cosmic rays ‘photobombing’ the imaging sensors, or minor defects arising from the telescope and instruments, like noise or faulty pixels. These are cleaned before the image is ‘colourised’.
Colourising an image involves taking two or more frames made using different filters, assigning a different colour to the black and white pixels of each, and then merging them so that the colours combine. This technique is very similar to that used to create the very first colour photographs. The pixels in the screen that you might be reading this on work in a similar way. Each pixel contains three or four sub-pixels, with at least one each in red, green and blue (RGB). Where all of the sub-pixels are active, your eye sees white light, and where they differ in brightness the light combines to produce different colours. Because of this, it is usually best to use three RGB frames to create a colourised image, but it’s always possible to use more and make an image with more depth and colour detail.
The frames are stacked and then carefully ‘registered’, which means aligning the stars, galaxies and other celestial objects visible in each frame exactly on top of one another. This is possible because these objects don’t perceptibly move during an exposure. However, a comparatively fast-moving object in our Solar System, such as an asteroid, might leave a different trace in each exposure, resulting in a long trail split into several colours.
A stacked image created from four JWST frames in different filters across the mid-infrared wavelength range, far from visible light. They have been registered, and each frame has been given a colour to identify it. For the final image processing, they will be merged into a single layer and colour-corrected.
The exact colours that are chosen for the RGB frames differ from image to image. If the image is of visible light, then filters can be chosen which approximate the red, green and blue wavelengths that our eyes are sensitive to. Webb, however, sees almost entirely ‘colours’ of light that are invisible to our eyes; it is only sensitive to a little bit of red light, but a wide range of invisible infrared light. Therefore colours must be chosen to represent those invisible wavelengths. The resulting image is called a ‘representative colour’ image.
For Webb images, the colours are carefully chosen to best represent the object being portrayed. That starts with the filters; since it isn’t possible to choose filters close to visible light, there is a lot of freedom. Generally, frames are chosen which are well separated in wavelength, to make an image showing the target across the spectrum and highlighting many features in the celestial objects seen in the image. Then each filter is given a colour. In most cases, it is conventional to assign a red colour to the longer-wavelength filters, and blue to the shorter wavelengths, so the progression of the colours in the image is in the same order as the wavelengths are in visible light.
Beyond this restriction, though, colourising images is based on aesthetic preference, making this practice both a science and an art. The best full-colour images have filters and colours carefully chosen to showcase all aspects of the object, to be clear to the viewer, and to look appealing when combined in the final image. While the colours might be representative, the dark areas show the darkness of space or dense molecular clouds, and the bright regions show the light-emitting features in celestial objects, just as Webb saw them. Colour adds a third dimension to astronomical images and helps us to understand what we’re looking at — even if it’s invisible to the naked eye!

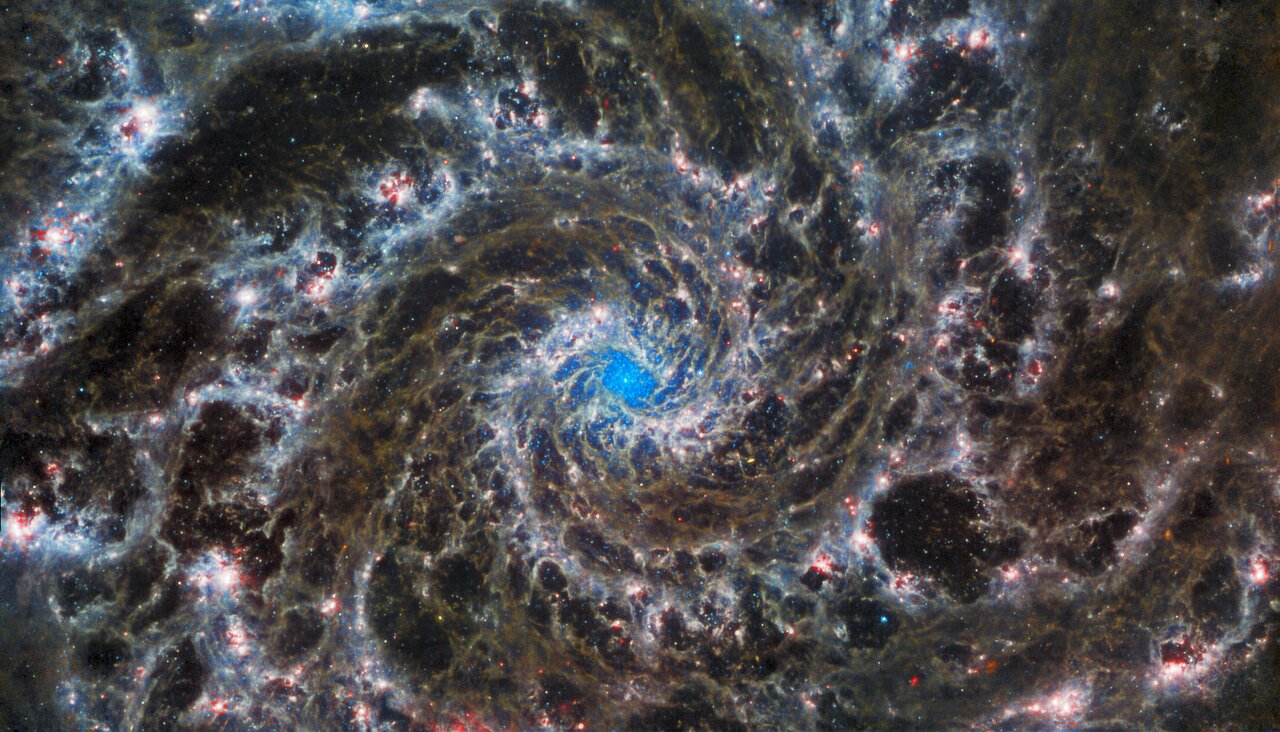
The final full-colour image of M74. As well as the stacked frames being merged and the colours corrected to create the best possible image, it has been cropped slightly to cut out the ragged edges.
Astronomers often do not create full-colour images such as the one above. They will usually process the raw exposures to remove artefacts and defects, create stacked images if they have multiple exposures, and then use computer software to analyse the cleaned images. Today’s scientific techniques usually don’t necessitate actually looking at the images at all!
However, image processing is still very useful for astronomers. Creating a colour image helps to highlight different features of the target and show how visible they are at different wavelengths. This can be used to identify different features of a target, like star-forming regions or dust in a galaxy, or the distribution of stars in a cluster, and can be useful to astronomers during the research process by helping them understand their target objects better. It also helps a team to explain their results to other astronomers, just as much as to the public! A well-made image allows astronomers reading or reviewing a paper to understand its results, aiding in the scientific process.
Processing your own images
The raw exposures from science programmes on the James Webb Space Telescope are available to both the scientific community and the public alike to download. Many images are available as soon as they are received. The European Space Agency (ESA) operates an archive of all Webb scientific data; there, you can search for images based on coordinates, name, mission and more. The images from JWST and many more space telescopes are also available on the Space Telescope Science Institute (STScI)’s MAST portal.
The raw images you can obtain from those archives are stored in the FITS format, which is commonly used by telescopes both in space and on Earth. Converting these images into a format, such as TIFF, which can be edited with standard graphics software can be done using the FITS Liberator tool. Developed by an international team including astronomers from ESA and STScI, it is available from the ESA/Hubble Space Telescope website. If you want to try your hand at creating your own colourised images from Webb data, this is the place to start!

